A Way In

This print was completed in August of 98.  I usually start by taking pictures of something I find interesting, then work from the slides or snapshots to make a line tracing.


This is the tracing on canary yellow tracing paper, made from a slide.  This step establishes the composition, and indicates a lot of the detail. I can combine elements from different sources, retrace the image to alter or refine parts of the drawing, etc. until I'm happy with the image. It's the same size and shape as the plate. The next step is to transfer these lines to the plate.


This is the first line proof, printed from the plate.  I coated the copper plate with a soft asphaltum ground, a coating that protects the copper from the etching fluid.  The lines from the tracing were transferred from the tracing to the ground by laying the tracing on top of the coated plate, and retracing the lines with a mechanical pencil.  The pencil point pressing on the paper overlay presses the paper through the soft ground, creating breaks in the coating that allow the etching fluid to reach the copper and to eat into the copper, creating little pits and ditches that hold ink and print a line.

Now, we need some tones.  


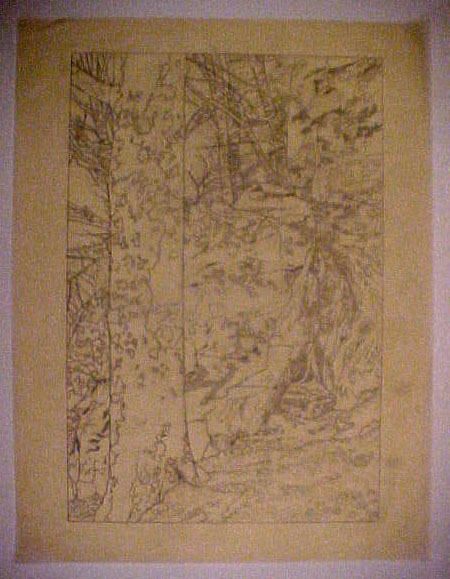
First I want to have a clear idea of where I want to have the dark and light tones, so I print another line proof and paint washes on it in black watercolor, or ink.

This gives me a clear plan for putting these darks and lights on the plate.  I usually create tones on the plate by using aquatint.  Aquatint consists of dusting the plate with powdered rosin, then heating the rosin until it melts and sticks to the plate.  It sticks to the plate in little dots, with open spaces between the dots where the metal is exposed and therefore the etching fluid (which is blocked wherever a dot of rosin is stuck to the metal) can etch around and between the random dots, which roughs up the surface of the copper and allows the plate, now with roughed places on the surface of it, to hold ink in tonal areas as well as lines. The fluid eats more if you leave it in longer, so light tones are made by letting the fluid etch short times and dark tones are made by allowing the fluid to etch longer.

So, we etch aquatints on to the plate, making our best guess about how long to leave it in the etching fluid to get the shade of gray we want.  That's what keeps etching interesting: you never really know what you're doing.

Having etched, we clean off the plate again and print another proof.


Oops!...kind of dark.  Oh well; so it's a bit later in the day than we originally planned.

You can lighten aquatints by scraping and burnishing, sanding, steel wooling, etc.  So, a few hours later, with protesting fingers...


Voila!   OK, so it doesn't look much different.  It's on a whiter piece of paper.  Trust me; a bunch of places in there are lighter, and I'm getting easier to please.

In fact, that's it; except for the hand coloring.  This is what it looks like without any hand coloring on it.  So I make some proofs of this, and go play around with watercolors until I have something I like, which becomes the official version.

Since I ink, wipe, and hand color each print individually, there is some variation from one print to the next.  However, I keep my standard copy on hand, and try to keep them as consistent as possible. I'm more concerned with "does it look good" than "does it look exactly the same".