To assemble the box all you really need is a screwdriver (most of the screws are philips head, six are slotted) and small adjustable wrench. An electric screwdriver is good, since there are about 50 screws. (Be careful not to tighten the screws excessively - you can strip them.) A couple of 24 inch capacity clamps can also be useful for holding pieces in place while screws are being inserted.
Since all the screws have holes to go into, it is best to hold the two parts (box edges) about 1/4 or 1/2 inch apart and manually insert the screws into their respective holes so you can see that all the screws are into their proper holes before you screw them in. Or, you can get the edges accurately aligned with each other, then starting with the holes at either end of a line of holes, insert the screws and screw them in as far as you can with your fingers. Finish tightening with a screwdriver.
All the components are marked with alphabetical characters on both surfaces of the parts that go together, so you start by mating A with A, then attach B to B, etc. through H.
Exterior surfaces are painted, inside of box is unpainted. Apply spackling compound to exterior of seams to seal any cracks, and fill to cover countersunk screws. Give box a final coat of paint, as desired.
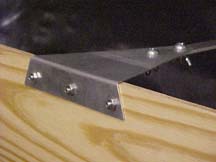
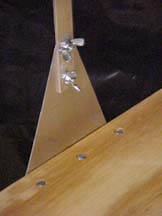
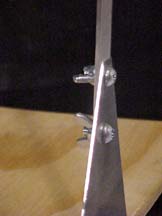
Here are some pictures of how the tray and handle hardware go
together:
|
|
|