Back to Aquatint Box page Cut-List and Materials for box with metal handles
These boxes can be made from 3/4 inch plywood, but a better material for the main body of the box is 3/4 inch MDF (medium density fiberboard), since it's cheaper, not warped, full dimension and has no significant disadvantages as a construction material for these boxes. For this cut-list I will use an all-wood (except for the bolts & screws) alternative for the tray handles and attachments. You lose 1.5 inches of usable tray space, but it's probably easier for most people to make than the metal alternative shown in some of the pictures. This box will accommodate an approximate maximum plate size of 14 x 21 inches (36 x 54 cm.). A box made to larger dimensions will work the same as one this size or smaller. The limitation would be that at some point increased size would make the box too physically large and unwieldly for the average operator to use. This box plan allows for an 1/8 inch gap between the edge of the tray and the wall of the box on all 4 sides to allow for airflow. I would assume that since a larger tray size would displace a larger volume of air during operation of the box, this gap would need to be increased proportionally.
| Box Assembly | Cut-list: End panels (2 each) - - - - 16 x24 in. Side panels (2 each)- - - - 23.5x24 in. Bottom (1 each) - - - - - - 16x22 in. Lids (2 each) - - - - - - - - 12x18 in. Material: Medium Density Fiberboard. Also needed: 2-inch drywall screws, wood filler, carpenter's glue. |
End
panels overlap edge of bottom. Side panels overlap bottom and end panels. Bottom panel is lapped by side and end panels. Lids: (see picture) To make the lids, cut them to the overall 12x18 in dimensions. When in position, the two lids will butt together forming a seam across the center of the box, through which the two 1/2 in. dowel rods of the tray handle will pass. The two lids will also be slightly inset into the box, so that they will be held in position. This means each lid will have a "seam" edge (the two edges that will butt together across the middle of the box) and three outer edges, which will rest on the upper edge of the box. You need to drill two holes through the "seam" for the dowel rods to pass through. To do this, clamp the two lids with their seam edges butted together. Drill a 5/8 in. diameter hole, centered 1.5 inches in from the outside edge and centered on the seam. A 5/8 in. hole will allow some clearance for the 1/2 in. dowel rod to move. Now cut a 1/4 in. by 1 in. rabbet in the 3 outer edges of each lid, forming a lip of 1/2 inch of lid to sit on top of the edge of the box and 1/4 inch of lid to fit down inside of the box to hold the lids in place. (The picture shows a rabbet cut along the seam edge of the lids, which isn't necessary but which you can do if you want to be able to reverse the lids and have the notches at the outside ends of the box for more complete closure of the box during storage, with the tray and handle disassembled and stored inside the box. This was my first prototype, which I still use.) The lids will overhang the outside of the box by 1/4 inch. WARNING: be accurate, or the tray handles will stick and bind during operation of the box. To assemble panels, clamp pieces in position. Drill holes/countersink and insert drywall screws. Fill cracks with wood filler or use glue. |
| Tray Assembly | Cut-list: Handle (1 each) - - - - - - 16x3/4x1.5 in. Blocks (2 each) - - - - - - 3/4x6x1.5 in. Material: nominal "1x4" pine (actual dimensions: 3/4x3.5 in.) Dowel rods (2 each) - - - 1/2x27 in. Material: 1/2 inch hardwood dowel rod. Tray (1 each) - - - - - - - 15 3/4x21 3/4 in. Material: 3/8 inch plywood. Also needed: 4 carriage bolts, 1/4 in. by 2.5 in. and 4 wing-nuts to screw on to the carriage bolts. |
To
make the
handle, cut a piece of wood from the piece of "1x4" pine 16 inches long
and 1.5 inches wide. (You can use a thicker piece of wood, if
you
have one.) You will need to drill two 1/2 inch diameter holes
to
receive the ends of the dowel rods. (see picture)
Center
the holes 1/2 inch in from each end of the handle. This will leave 1/4
inch of wood between the edge of the hole and the end of the handle,
and only 1/8 inch of wood between the edge of the hole and the sides of
the handle. The holes need to be straight (so the dowels will be
parallel), so a good bit and a drill-press would be good to have.
To make the blocks, cut two pieces six inches long and 1.5
inches
wide from the "1x4" pine. Mark the center (3 inches from
either
end) of the blocks. Drill a 1/2 inch diameter hole through the center
of each one (see picture), to receive the dowel rod. To drill
holes for the bolts to attach the blocks to the tray, center each block
on an edge of the tray with the edge of the block flush with the edge
of the tray. (The center of the tray will be 10 7/8 inches
from
either end.) Clamp the block to the tray, and drill a 5/16
in.
hole centered 5/8 in. from each end of each block through the block and
the tray. Insert 1/4x2.5 inch carriage bolts with wing-nuts through
these holes to secure the tray to the blocks. This will allow
you
to remove the handle from the tray if you want to store everything
inside the box. Use wood glue to secure the ends of the
dowels to
the handle and the blocks. To make the tray, cut a piece of 3/8 inch plywood 15 3/4 inches by 21 3/4 inches. |
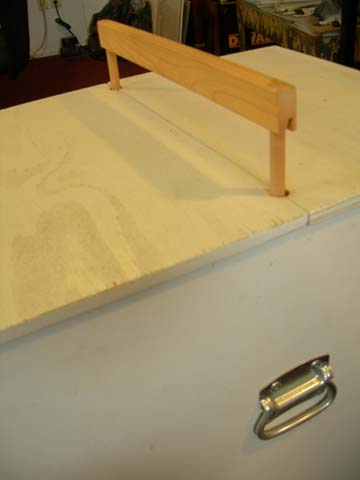 |
Handle and top of box with lids in place. |
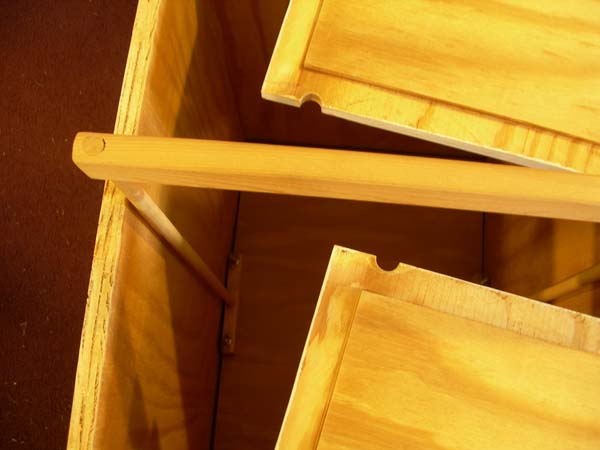 |
Underside of lids. |
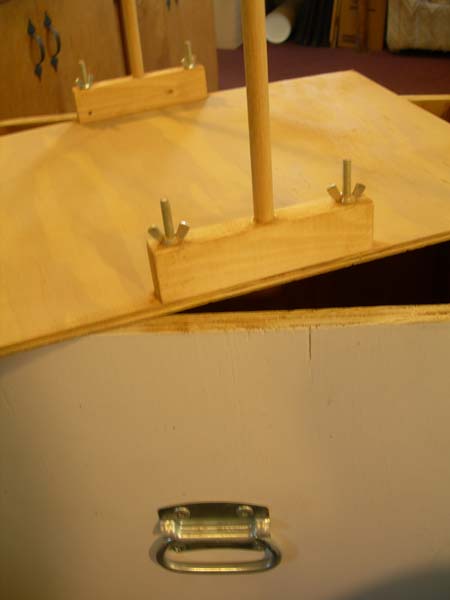 |
Blocks, attached to tray. |
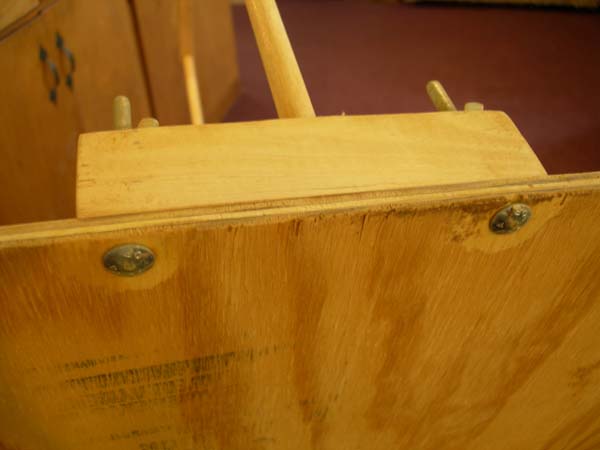 |
Bottom of tray, showing carriage bolts. |